

How To Apply The Same Settings In Lightroom
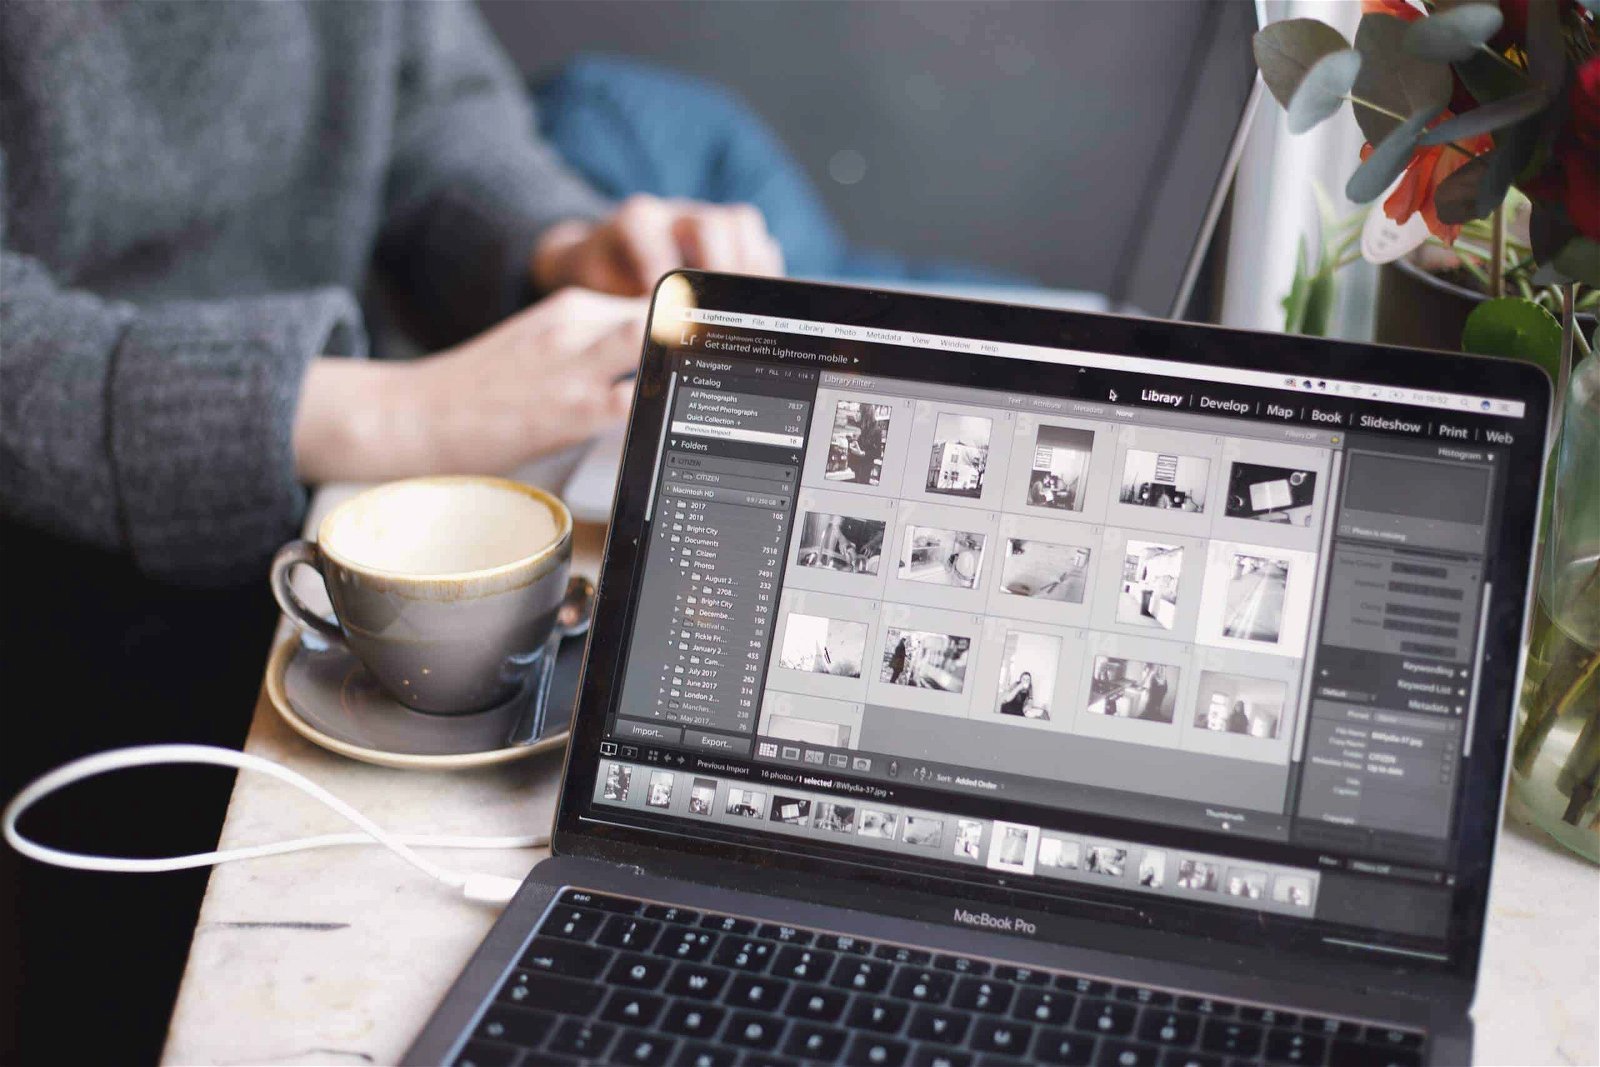
Remember the good ole' days of editing each photo individually? Thanks to Adobe Lightroom, photographers no longer have to process each photograph one by one. You lot can save lots of fourth dimension and energy past learning how to batch edit in lightroom.
In this tutorial, nosotros will teach y'all exactly how to do that, as well as provide multiple techniques you can use to speed up your workflow all while maintaining loftier-quality, well-edited photos. This is one of the most powerful features of Adobe Lightroom, so stick effectually and let'due south learn how to batch process some photos!
What is Batch Editing?
For those who aren't familiar with batch editing, information technology'south basically a mail-processing technique that allows you to edit multiple or even hundreds of photos at once. If yous accept photos with similar lighting conditions and exposures, you can save tons of fourth dimension by applying the same settings beyond all photos. This is an amazing feature that Adobe Lightroom has implemented in their organisation.
Batch Editing in Adobe Lightroom
Batch processing in Adobe Lightroom is more powerful than other applications because you tin selectively decide which settings to batch process. This is a non-destructive way to edit your photos in case y'all demand to go dorsum and fine melody each image individually.
Adobe Lightroom Presets
As mentioned above, Lightroom CC offers free presets for users, but there are many beautiful presets available online. Depending on the type of photography you do, you lot can easily find gorgeous presets specifically for food photography, fashion, landscapes, portraits, and many more than.
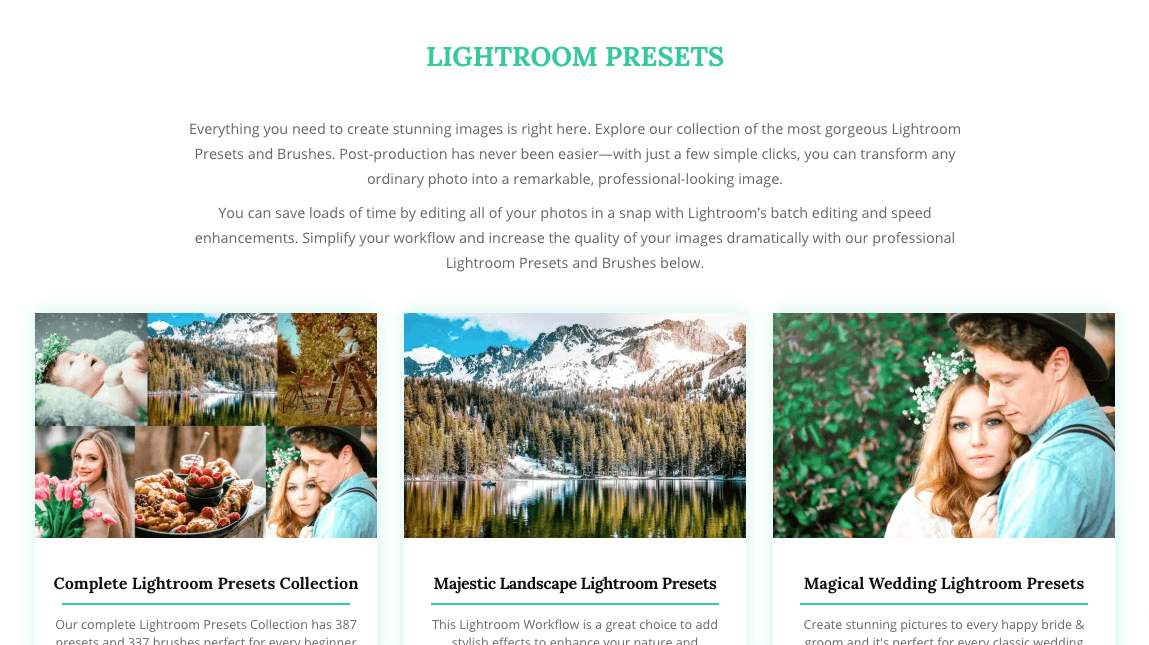
Choosing the correct preset for your photos will take a powerful artful impact on your photography. You tin can explore our wide drove of Adobe Lightroom Presets before beginning the batch editing procedure. Postal service production has never been easier and more accessible than with Adobe's creative presets and brush options.
How to Use the Edits to Multiple Photos
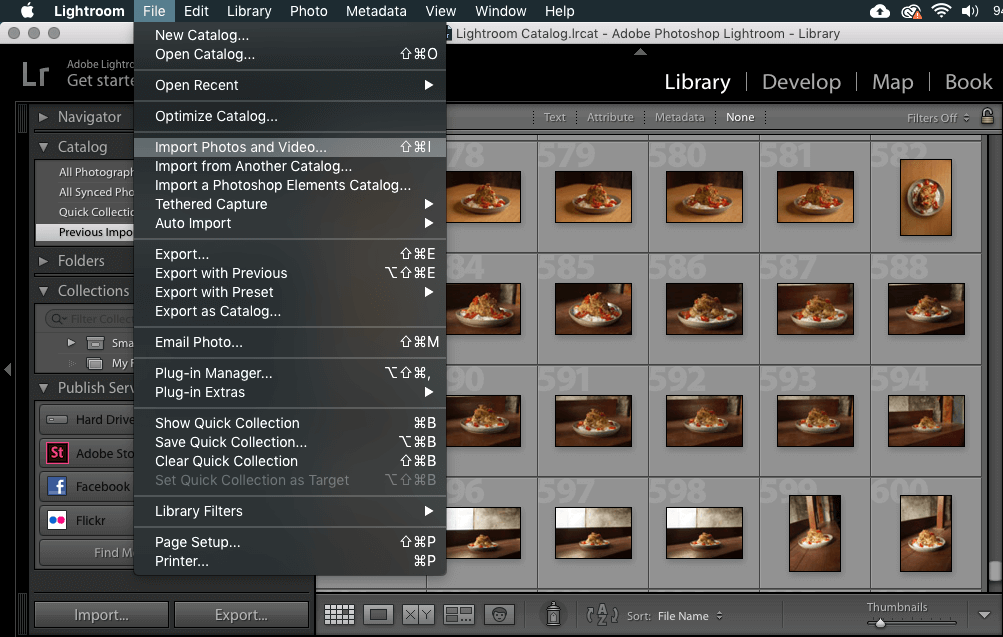
Pace 1: Import your photos. There are a few means to practice this:
- Locate the Import button in the lower-left corner of the Library module.
- Select File >Import Photos And Video.
- Drag your photos or folder from your calculator into the Filigree view.
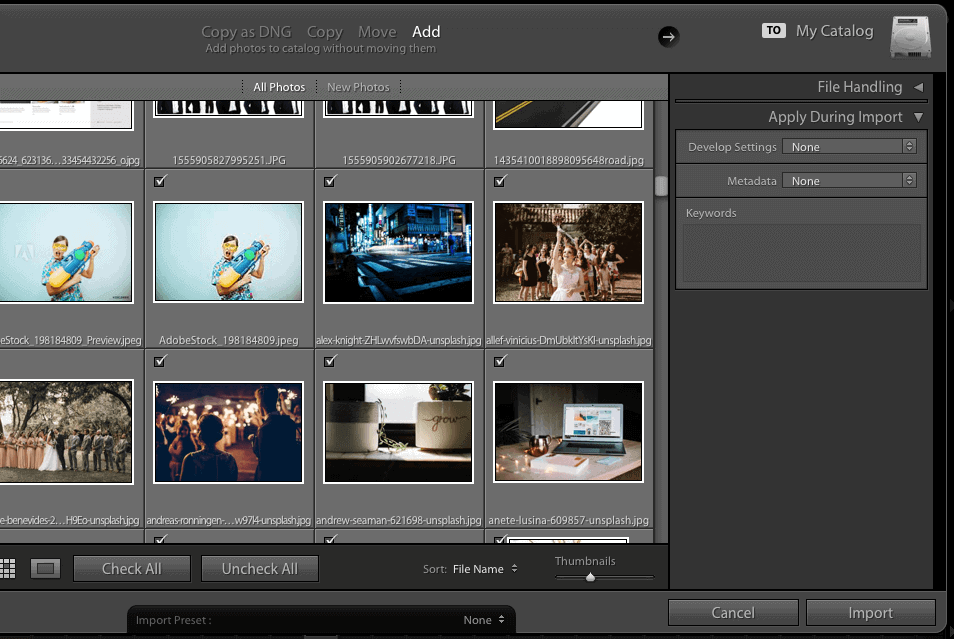
Once your photos have been imported, decide how you want to add them to the itemize. There are several ways to add them in Lightroom:
- Copy as DNG files: This converts your raw files to Adobe's Digital Negative Format (DNG).
- Re-create: Basic copying of your files to the selected folder.
- Motility: Move files from some other folder to the electric current binder.
- Add together: Select this when you desire to keep the files in the current location.
Next, you'll want to select the files you lot desire to import from the preview pane. Check all the ones you're planning to batch edit.
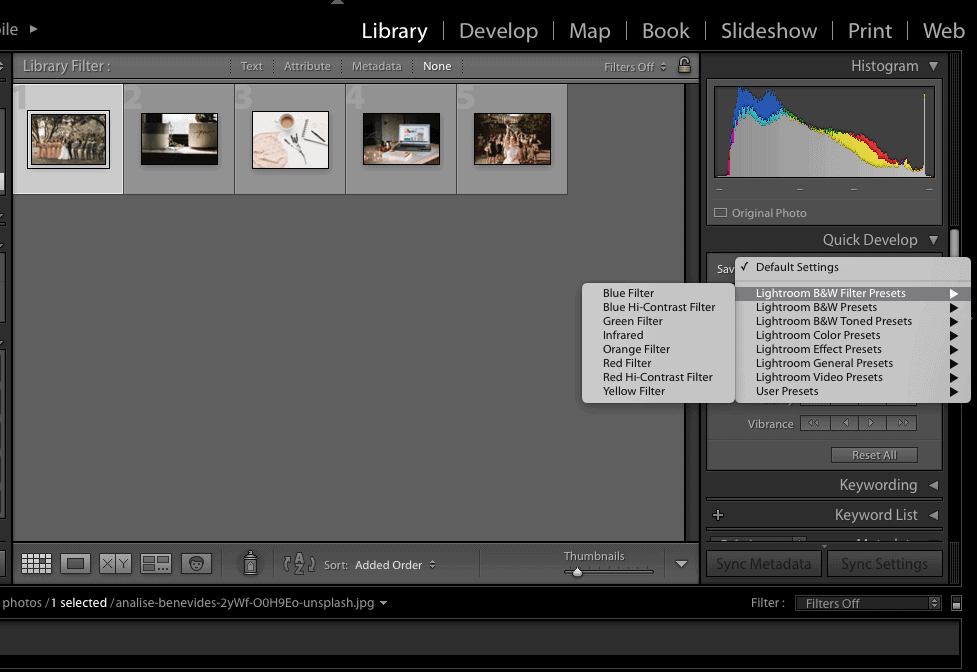
Step 2: Select a Preset to Edit Multiple Photos.
One of the fastest ways to start batch editing is to use Lightroom'southward free presets. This is offered by Lightroom CC. Once your photos have been imported, go to the Library tab. Notice the Quick Develop button on the right side of the screen.
At the drop-downwardly menu next to Saved Preset, select the preset of your option. You tin can go on experimenting until yous find the right preset. As soon as you click on a preset, the image will update and the preset should automatically utilize.
One time you've institute the perfect preset for your photograph, select Command + A (Mac) or Ctrl + A (PC) to select all of your photos. Yous may besides hold downwardly the Control or Ctrl key while selecting on the specific files yous want the preset to exist applied.
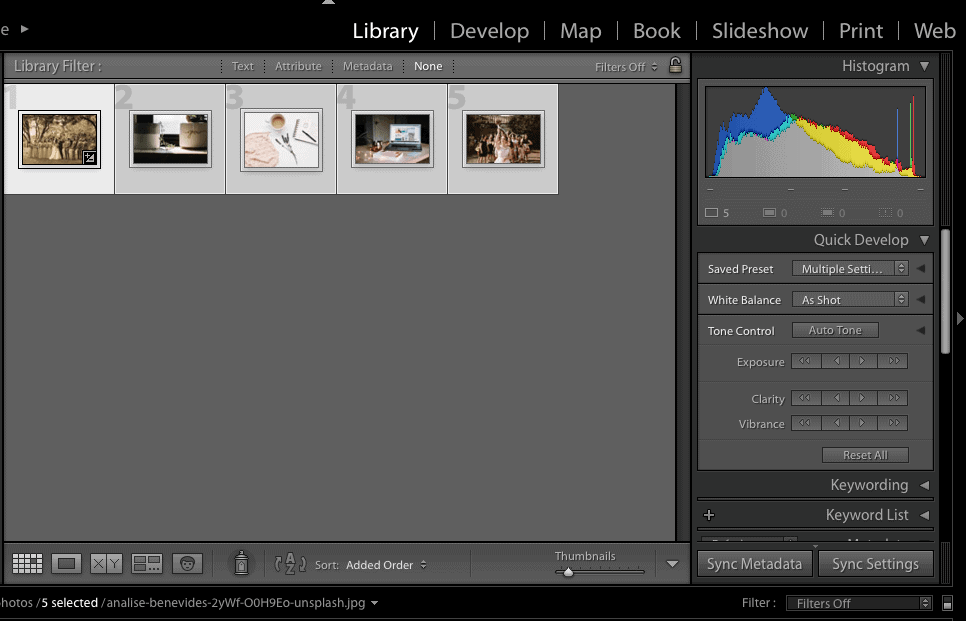
Stride 3: Use the Preset to your Photos
To utilize the preset to all the selected photos, printing the Sync button. A popular-upwards box will appear where yous can fine-melody the settings you want to be applied. Once yous're happy with the selections, click Synchronize to employ the settings to all your photos. Notice the thumbnails below volition alter and transform to your selected preset.
Footstep 4: Fine Melody and Apply Your Own Edits
Still not happy with the edits? No problem. You tin can easily apply your own edits to your photos under the Develop tab.
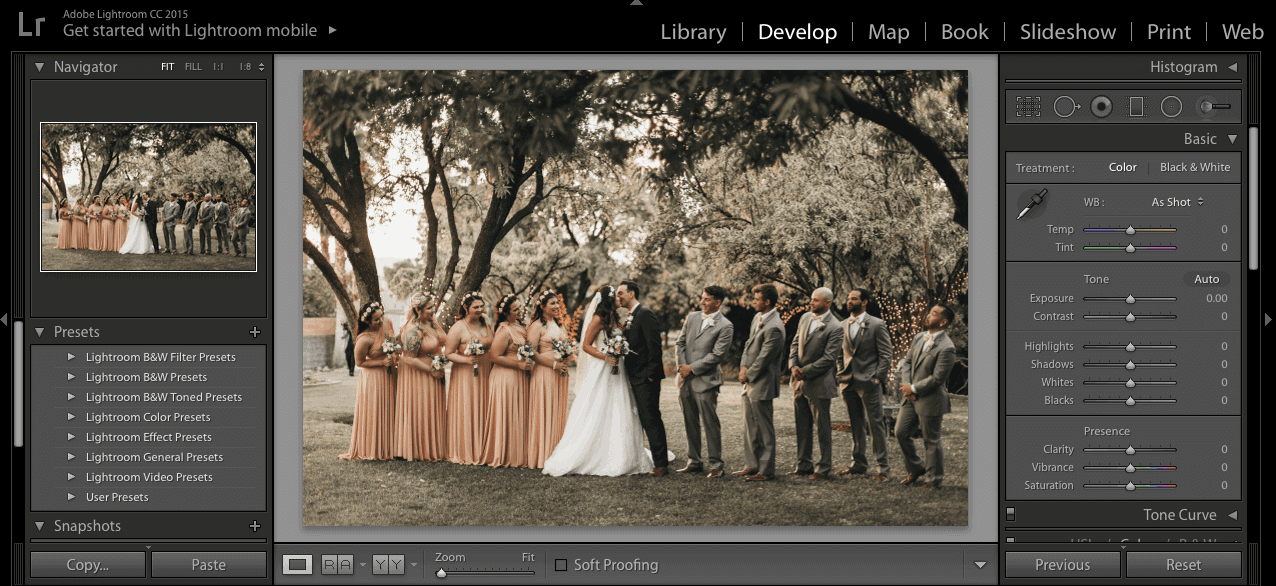
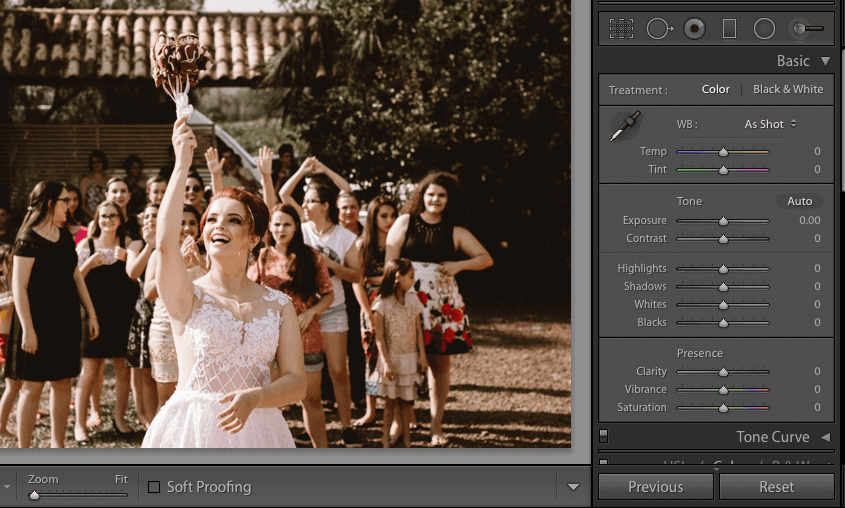
Select a photo from the thumbnail and let's offset editing! On the right side of the screen, notice the variety of editing tools you can choose to edit your photos. Nosotros won't get into nifty detail of the myriad of Lightroom tools and features, but allow's skim over the nuts.
Select the Basic tab to view some of the most common editing features. You can adapt the temperature, exposure, dissimilarity, highlights and shadows. Often times playing around with the basic settings can make a huge difference already.
You tin also go to the Black and White tab to transform your photos into blackness and white. Adjust the clarity and contrast for extra sharpness and dimension.
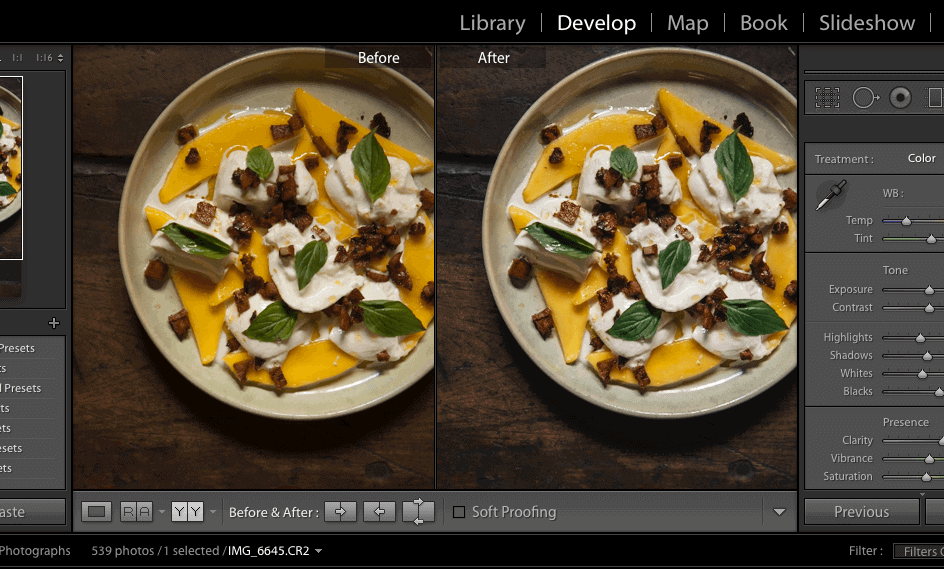
In one case you're happy with the edits, select all your photos in the thumbnail and click Car Sync. A pop-upwardly box will appear and go on to click on Synchronize to apply all the chosen edits. All of the photos in your thumbnail should transform to the new edits. How easy is that? Batch editing makes mail service processing a breeze!
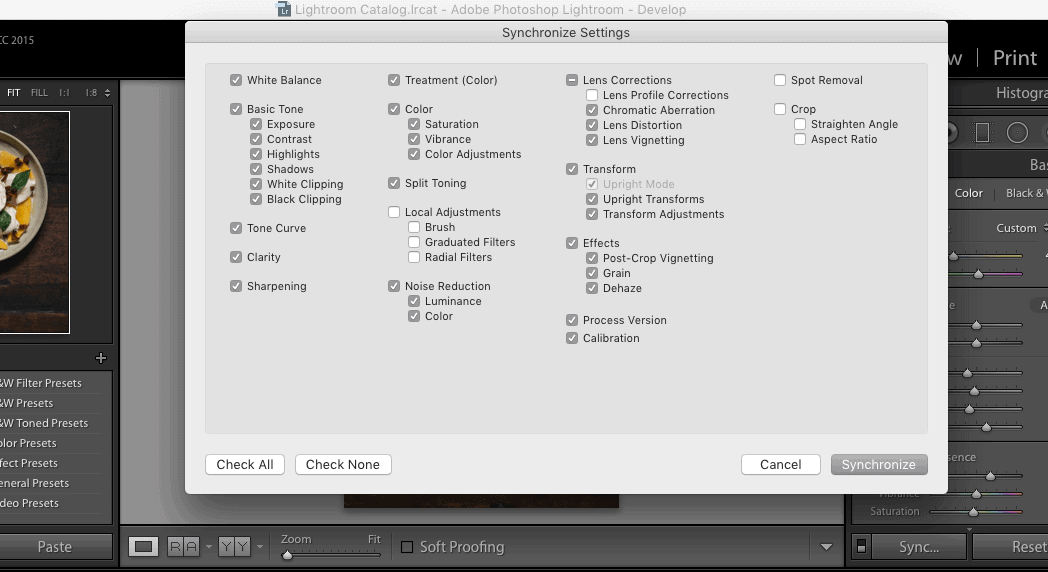
Step 5: Syncing Selective Edits
Here's where things become a little interesting. Adobe Lightroom has a feature that allows yous to selectively sync your edits. Why is this useful? Well, imagine you are editing i of your photos and want to crop it into a square image. And so, you decide the exposure was as well dark so you brightened it up a bit. Unless you want all your photos to be cropped into a square and they accept the exact same exposure, you'll desire to use this powerful feature to selectively sync your edits.
Call back the pop-up box that appears earlier you lot click Synchronize ? You'll want to revisit this pop-up box to select which settings y'all want to utilise to all your photos. For the above scenario mentioned, you'll desire to uncheck the Local Adjustments and Crop Settings . This will foreclose all your images from being cropped into a square and brightened upwards too much.
You can easily check and uncheck the dissimilar settings in this box depending on the types of edits you're doing. You would be surprised how powerful this feature is in Adobe Lightroom, saving you a lot of time and stress.
Stride 6: Resetting or United nations-doing your Batch Edits.
Adobe Lightroom is very forgiving when it comes to making corrections or resetting your edits. Yous tin can easily contrary your edits or simply reset everything back to its original state.
First, click on the Reset button located on the bottom right of the screen. This will reset everything on the selected photo.
If yous want to reset all your photos in the thumbnail, merely select all of the photos and printing Shift – Control – R or Shift – Control – R to reset the photos' Develop Settings.
Conclusion
As you can come across, batch editing is a wonderful way to transform your images hands and quickly. You should definitely employ this feature as a part of your everyday work process to save lots of fourth dimension and energy. With just a few clicks of a button, you tin can efficiently batch edit your images.
Keep in heed that each photo's edits may look differently even with the same preset, so you be sure to fine-tune it by going into the Develop tab and brand micro adjustments for quality results. This will keep your images looking professional person and consistent across the board.
Take you lot tried batch editing in Lightroom? Let u.s.a. know in the comments below your piece of work editing procedure!
Source: https://photographycourse.net/how-to-batch-edit-in-lightroom/
0 Response to "How To Apply The Same Settings In Lightroom"
Post a Comment